Create your first GLDF
Overview
In this step-by-step guide, we will create a simple GLDF file.
Prerequisites
- You need to know how to pack and unpack ZIP archives.
- You need a Text or XML Editor. Please see Requirements for recommendations and more information.
Structure of a GLDF file
GLDF is a container and ZIP-Archive file, simply renamed from .zip to .gldf. It contains the main product.xml file in the root directory, with all manufacturer and product information. And associated files like images, photometries and more in subdirectories (called Assets). To learn more about the GLDF container and its structure, please see About GLDF Container.
Preparation
To create your first gldf file, follow these steps:
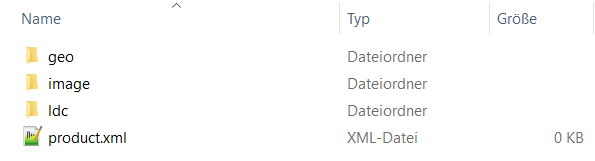
- Create a root directory named product
- Create an empty XML file named product.xml and place it in this root directory.
We will edit this file further below. - Create three subdirectories named geo, image, and ldc.
- Download the Eulumdat photometry and store it in the ldc directory.
- Download the L3D geometry and store it in the geo directory.
- Download the PNG image and store it in the image directory.
Your directory should look like this now:
The product.xml file
The heart of a GLDF file is the product.xml file, located in the root of the zip archive. It contains all the manufacturer and product information written in XML. The GLDF XML Schema (XSD) defines the exact structure of the XML code in product.xml. You can validate your XML file against this XSD to ensure your GLDF has no errors.
At top level, GLDF XML begins with a Root element, which in turn contains three child elements:
HeaderGeneralDefinitionsProductDefinitions
Please see XML hierarchy for more information.
Step 1: Basic XML structure
The following example highlights the Root element mentioned above, with its three child elements Header, GeneralDefinitions and ProductDefinitions. Open the just created product.xml file in your favorite text editor and add the following code. Most elements are empty or contain placeholder text at this stage. We will gradually expand them further below.
<?xml version="1.0" encoding="UTF-8"?>
<Root xmlns:xsi="http://www.w3.org/2001/XMLSchema-instance"
  xsi:noNamespaceSchemaLocation="https://gldf.io/xsd/gldf/1.0.0-rc.3/gldf.xsd">
  <Header>
    <Manufacturer>Your Coompany Name</Manufacturer>
    <FormatVersion major="1" minor="0" pre-release="3" />
    <CreatedWithApplication>Your Code Editor</CreatedWithApplication>
    <GldfCreationTimeCode>2023-10-23T16:30:00Z</GldfCreationTimeCode>
    <UniqueGldfId>Your unique Gldf Id</UniqueGldfId>
  </Header>
  <GeneralDefinitions>
    <!-- No general definitions yet -->
  </GeneralDefinitions>
  <ProductDefinitions>
    <ProductMetaData>
      <UniqueProductId>Your unique Product Id</UniqueProductId>
      <ProductNumber>
        <Locale language="en"></Locale>
      </ProductNumber>
      <Name>
        <Locale language="en"></Locale>
      </Name>
    </ProductMetaData>
    <Variants>
      <Variant id="variant-1">
        <Name>
          <Locale language="en"></Locale>
        </Name>
      </Variant>
    </Variants>
  </ProductDefinitions>
</Root>
If you are using a code editor that supports XML Schema validation, you should now be able to validate the XML code against the XSD (see Requirements).
Header
Step 2: Manufacturer Metadata
The first step for each GLDF is to define some metadata in the Header element. It contains information about the GLDF file itself and the manufacturer of the product. In this example, we will keep things simple and concentrate on only mandatory elements of the Header element. In a real GLDF, however, it is always advisable to specify further data, such as contact information and more. A complete description about the possible Header content is provided here.
For this example, let's assume we are working for the luminaire manufacturer ACME lighting and are writing this GLDF using the Visual Studio Code editor. The current GLDF version is 1.0-rc.3 and today is the 23rd of October. We generate a worldwide unique Id for this GLDF using the UUID Online Generator.
Replace your Header part in your product.xml with this concrete data:
<Header>
  <Manufacturer>ACME lighting</Manufacturer>
  <FormatVersion major="1" minor="0" pre-release="3" />
  <CreatedWithApplication>Visual Studio Code</CreatedWithApplication>
  <GldfCreationTimeCode>2023-10-23T16:30:00Z</GldfCreationTimeCode>
  <UniqueGldfId>159248fe-2ec4-4021-b68f-42ce491b8edf</UniqueGldfId>
</Header>
The meaning and importance of UniqueGldfId is described here: Unique Ids.
General Definitions
GLDF is based on a modular structure. You define blocks of the same kind of information first, which successively build on each other. For example, information about the required photometries are defined first, which then can be used in the description of lamps to describe them photometrically. A lamp in turn can be combined with the description of a ballast later. To finally describe a light output of the luminaire. Once defined, many elements can be reused this way, even mutiple times.
In the next steps, we will gradually define some of these parts as childs of the GeneralDefinitions element. And use them later in the product definitions section to form the final luminaire.
Step 3: Add Files
First, we will add Files to the GeneralDefinitions section. To use our downloaded Eulumdat file, product picture and the geometry model, we need to declare these files for later reference. We have three files, that means we need to add three File elements to the Files collection.
Replace
<!-- No general definitions yet -->
with these lines:
<Files>
  <File id="ldtFile-1" contentType="ldc/eulumdat"
        type="localFileName">photometry.ldt</File>
  <File id="pictureFile-1" contentType="image/png"
        type="localFileName">luminaire.png</File>
  <File id="geometryFile-1" contentType="geo/l3d"
        type="localFileName">geometry.l3d</File>
</Files>
Step 4: Add Photometry
Next, we add a Photometry definition with a LuminousEfficacy of 98.2 and define the CIE-Flux code as 44 75 94 100 100. Add these lines below the last ones you added in the last step:
<Photometries>
  <Photometry id="photometry-1">
    <PhotometryFileReference fileId="ldtFile-1" />
    <DescriptivePhotometry>
      <LuminousEfficacy>98.2</LuminousEfficacy>
      <CIE-FluxCode>44 75 94 100 100</CIE-FluxCode>
    </DescriptivePhotometry>
  </Photometry>
</Photometries>
Step 5: Add LightSource
Now, we will add a FixedLightSource with a Name and a Description, both translated into English and German. It has a rated input power of 10.2 (W), a color rendering index of 90, and a color temperature of 2700 (K). We provide also the lifetime in hours and add maintenance factor information.
<LightSources>
  <FixedLightSource id="fixedLightSource-1">
    <Name>
      <Locale language="en">LED 10W</Locale>
      <Locale language="de">LED 10W</Locale>
    </Name>
    <Description>
      <Locale language="en">Warm white</Locale>
      <Locale language="de">Warmweiß</Locale>
    </Description>
    <RatedInputPower>10.2</RatedInputPower>
    <ColorInformation>
      <ColorRenderingIndex>90</ColorRenderingIndex>
      <CorrelatedColorTemperature>2700</CorrelatedColorTemperature>
    </ColorInformation>
    <LightSourceMaintenance lifetime="50000">
      <LedMaintenanceFactor hours="25000">0.94</LedMaintenanceFactor>
    </LightSourceMaintenance>
  </FixedLightSource>
</LightSources>
Step 6: Add ControlGear
Next we add a ControlGear with a Name and Description. We will also set some useful power properties.
<ControlGears>
  <ControlGear id="controlGear-1">
    <Name>
      <Locale language="en">LED driver</Locale>
      <Locale language="de">LED Vorschaltgerät</Locale>
    </Name>
    <Description>
      <Locale language="en">LED driver 15W</Locale>
      <Locale language="de">LED Vorschaltgerät 15W</Locale>
    </Description>
    <StandbyPower>0.7</StandbyPower>
    <ConstantLightOutputStartPower>10.2</ConstantLightOutputStartPower>
    <ConstantLightOutputEndPower>14.7</ConstantLightOutputEndPower>
    <PowerConsumptionControls>0.8</PowerConsumptionControls>
  </ControlGear>
</ControlGears>
You can always check the Overview of Units if you are unsure about the input.
Step 7: Add Emitter
Now we will combine the previously defined parts in an Emitter. It can later be referenced via its id emitter-1. In the same way, we are referencing the Photometry, LightSource, and ControlGear elements via their ids. We will also set the luminous flux to 1000.
<Emitters>
  <Emitter id="emitter-1">
    <FixedLightEmitter>
      <PhotometryReference photometryId="photometry-1" />
      <LightSourceReference fixedLightSourceId="fixedLightSource-1" />
      <ControlGearReference controlGearId="controlGear-1" />
      <RatedLuminousFlux>1000</RatedLuminousFlux>
    </FixedLightEmitter>
  </Emitter>
</Emitters>
Step 8: Add Geometry
Finally, we will define a Geometry section that will reference our L3D file from the file definitions.
<Geometries>
  <ModelGeometry id="geometry-1">
    <GeometryFileReference fileId="geometryFile-1" />
  </ModelGeometry>
</Geometries>
Current XML
Now that we have defined all the blocks inside GeneralDefinitions, our XML should look like this:
<?xml version="1.0" encoding="UTF-8"?>
<Root xmlns:xsi="http://www.w3.org/2001/XMLSchema-instance"
      xsi:noNamespaceSchemaLocation="https://gldf.io/xsd/gldf/1.0.0-rc.3/gldf.xsd">
  <Header>
    <Manufacturer>ACME lighting</Manufacturer>
    <FormatVersion major="1" minor="0" pre-release="3" />
    <CreatedWithApplication>Your Code Editor</CreatedWithApplication>
    <GldfCreationTimeCode>2023-10-23T16:30:00Z</GldfCreationTimeCode>
    <UniqueGldfId>Your unique Gldf Id</UniqueGldfId>
  </Header>
  <GeneralDefinitions>
    <Files>
      <File id="ldtFile-1" contentType="ldc/eulumdat"
            type="localFileName">photometry.ldt</File>
      <File id="pictureFile-1" contentType="image/png"
            type="localFileName">luminaire.png</File>
      <File id="geometryFile-1" contentType="geo/l3d"
            type="localFileName">geometry.l3d</File>
    </Files>
    <Photometries>
      <Photometry id="photometry-1">
        <PhotometryFileReference fileId="ldtFile-1" />
        <DescriptivePhotometry>
          <LuminousEfficacy>98.2</LuminousEfficacy>
          <CIE-FluxCode>44 75 94 100 100</CIE-FluxCode>
        </DescriptivePhotometry>
      </Photometry>
    </Photometries>
    <LightSources>
      <FixedLightSource id="fixedLightSource-1">
        <Name>
          <Locale language="en">LED 10W</Locale>
          <Locale language="de">LED 10W</Locale>
        </Name>
        <Description>
          <Locale language="en">Warm white</Locale>
          <Locale language="de">Warmweiß</Locale>
        </Description>
        <RatedInputPower>10.2</RatedInputPower>
        <ColorInformation>
          <ColorRenderingIndex>90</ColorRenderingIndex>
          <CorrelatedColorTemperature>3000</CorrelatedColorTemperature>
        </ColorInformation>
        <LightSourceMaintenance lifetime="50000">
          <LedMaintenanceFactor hours="25000">0.94</LedMaintenanceFactor>
        </LightSourceMaintenance>
      </FixedLightSource>
    </LightSources>
    <ControlGears>
      <ControlGear id="controlGear-1">
        <Name>
          <Locale language="en">LED driver</Locale>
          <Locale language="de">LED Vorschaltgerät</Locale>
        </Name>
        <Description>
          <Locale language="en">LED driver 15W</Locale>
          <Locale language="de">LED Vorschaltgerät 15W</Locale>
        </Description>
        <StandbyPower>0.7</StandbyPower>
        <ConstantLightOutputStartPower>10.2</ConstantLightOutputStartPower>
        <ConstantLightOutputEndPower>14.7</ConstantLightOutputEndPower>
        <PowerConsumptionControls>0.8</PowerConsumptionControls>
      </ControlGear>
    </ControlGears>
    <Emitters>
      <Emitter id="emitter-1">
        <FixedLightEmitter emergencyBehaviour="None">
          <PhotometryReference photometryId="photometry-1" />
          <LightSourceReference fixedLightSourceId="fixedLightSource-1" />
          <ControlGearReference controlGearId="controlGear-1" />
          <RatedLuminousFlux>1000</RatedLuminousFlux>
        </FixedLightEmitter>
      </Emitter>
    </Emitters>
    <Geometries>
      <ModelGeometry id="geometry-1">
        <GeometryFileReference fileId="geometryFile-1" />
      </ModelGeometry>
    </Geometries>
  </GeneralDefinitions>
  <ProductDefinitions>
    <ProductMetaData>
      <UniqueProductId>Your unique Product Id</UniqueProductId>
      <ProductNumber>
        <Locale language="en"></Locale>
      </ProductNumber>
      <Name>
        <Locale language="en"></Locale>
      </Name>
    </ProductMetaData>
    <Variants>
      <Variant id="variant-1">
        <Name>
          <Locale language="en"></Locale>
        </Name>
      </Variant>
    </Variants>
  </ProductDefinitions>
</Root>
Product Definitions
Now that we have defined all the necessary "general parts", the next goal is to assemble them into a complete luminaire. In the ProductDefinitions section, we combine these building blocks we defined in the GeneralDefinitions section into a final product. The product definitions consists of two child elements:
- ProductMetadata
ProductMetadata defines global product information that applies to all variants of a GLDF. Instead of defining information multiple times for each variant, you can set the information in the globalProductMetadatainstead. - Variants
Variants are considered variations of a given product but not entirely different products. If your product comes in different variations like color or mounting types, you can create several variants for each version.
Do not misuse variants to combine completely unrelated products in a single GLDF file.
Step 9: Add ProductMetadata
First, likewise for the UniqueGldfId in step 2, we generate for UniqueProductId a worldwide unique product Id using the UUID Online Generator. But this time not to identify this single GLDF file, but to identify the product inside it.
<UniqueProductId>ffaeabab-f040-4a61-a6d1-e879d8f2e374</UniqueProductId>
In contrast to the UniqueGldfId, which should be generated anew for each GLDF every time, the UniqueProductId should be generated only once per product. And then reused for that product across GLDF files, should you distribute updates of it. It is also possible to simply use your product number for UniqueProductId. However, ensure, that it is really unique and doesn't change during the lifetime of your products.
We also define a product number and a product name, again translated into English and German. Finally, we add the previously defined image, and label it as a Product Picture.
Replace your ProductMetaData with the following code:
<ProductMetaData>
  <UniqueProductId>ffaeabab-f040-4a61-a6d1-e879d8f2e374</UniqueProductId>
  <ProductNumber>
    <Locale language="en">42</Locale>
    <Locale language="de">42</Locale>
  </ProductNumber>
  <Name>
    <Locale language="en">Pendant luminaire</Locale>
    <Locale language="de">Pendelleuchte</Locale>
  </Name>
  <Description>
    <Locale language="en">Round pendant light for indoor spaces</Locale>
    <Locale language="de">Runde Pendelleuchte für Innenräume</Locale>
  </Description>
  <Pictures>
    <image imageType="Product Picture" fileId="pictureFile-1" />
  </Pictures>
</ProductMetaData>
Step 10: Add a Variant
Last but not least, we will combine all the previously prepared building blocks into a Variant. Again, we add a simple Name and Description first.
The core of each Variant is the Geometry element. It combines the radiation emitting parts (light sources and sensors) with the 3D geometry of the luminaire. There are three ways in which the geometry can be represented in the GLDF:
- The simplest case is to use the simple geometry of the photometry file
- Another possibility is to define a simple geometry in the form of a cuboid or cylinder in the GLDF. And thus to overwrite the 3D model of the photometry.
- The most elegant way is to provide your own 3D model with it - see 3D Introduction
In our example, we create one Variant of our luminaire. We reference the previously created Geometry and combine this it with the previously created light Emitter. Finally, we hav to tell applications, to which surface they have to attach this light emitter. In our model, this surface was named leo.
<Variant id="variant-1">
  <Name>
    <Locale language="en">Pendant luminaire</Locale>
    <Locale language="de">Pendelleuchte</Locale>
  </Name>
  <Description>
    <Locale language="en">Description of variant 2</Locale>
    <Locale language="de">Beschreibung der Variante 2</Locale>
  </Description>
  <Geometry>
    <ModelGeometryReference geometryId="geometry-1">
      <EmitterReference emitterId="emitter-1">
        <EmitterObjectExternalName>leo</EmitterObjectExternalName>
      </EmitterReference>
    </ModelGeometryReference>
  </Geometry>
</Variant>
Step 11: Finishing up
The final XML code should look like this:
<?xml version="1.0" encoding="UTF-8"?>
<Root xmlns:xsi="http://www.w3.org/2001/XMLSchema-instance"
      xsi:noNamespaceSchemaLocation="https://gldf.io/xsd/gldf/1.0.0-rc.3/gldf.xsd">
  <Header>
    <Manufacturer>ACME lighting</Manufacturer>
    <FormatVersion major="1" minor="0" pre-release="3" />
    <CreatedWithApplication>Visual Studio Code</CreatedWithApplication>
    <GldfCreationTimeCode>2023-10-23T16:30:00Z</GldfCreationTimeCode>
    <UniqueGldfId>159248fe-2ec4-4021-b68f-42ce491b8edf</UniqueGldfId>
  </Header>
  <GeneralDefinitions>
    <Files>
      <File id="ldtFile-1" contentType="ldc/eulumdat"
            type="localFileName">photometry.ldt</File>
      <File id="pictureFile-1" contentType="image/png"
            type="localFileName">luminaire.png</File>
      <File id="geometryFile-1" contentType="geo/l3d"
            type="localFileName">geometry.l3d</File>
    </Files>
    <Photometries>
      <Photometry id="photometry-1">
        <PhotometryFileReference fileId="ldtFile-1" />
        <DescriptivePhotometry>
          <LuminousEfficacy>98.2</LuminousEfficacy>
          <CIE-FluxCode>44 75 94 100 100</CIE-FluxCode>
        </DescriptivePhotometry>
      </Photometry>
    </Photometries>
    <LightSources>
      <FixedLightSource id="fixedLightSource-1">
        <Name>
          <Locale language="en">LED 10W</Locale>
          <Locale language="de">LED 10W</Locale>
        </Name>
        <Description>
          <Locale language="en">Warm white</Locale>
          <Locale language="de">Warmweiß</Locale>
        </Description>
        <RatedInputPower>10.2</RatedInputPower>
        <ColorInformation>
          <ColorRenderingIndex>90</ColorRenderingIndex>
          <CorrelatedColorTemperature>3000</CorrelatedColorTemperature>
        </ColorInformation>
        <LightSourceMaintenance lifetime="50000">
          <LedMaintenanceFactor hours="25000">0.94</LedMaintenanceFactor>
        </LightSourceMaintenance>
      </FixedLightSource>
    </LightSources>
    <ControlGears>
      <ControlGear id="controlGear-1">
        <Name>
          <Locale language="en">LED driver</Locale>
          <Locale language="de">LED Vorschaltgerät</Locale>
        </Name>
        <Description>
          <Locale language="en">LED driver 15W</Locale>
          <Locale language="de">LED Vorschaltgerät 15W</Locale>
        </Description>
        <StandbyPower>0.7</StandbyPower>
        <ConstantLightOutputStartPower>10.2</ConstantLightOutputStartPower>
        <ConstantLightOutputEndPower>14.7</ConstantLightOutputEndPower>
        <PowerConsumptionControls>0.8</PowerConsumptionControls>
      </ControlGear>
    </ControlGears>
    <Emitters>
      <Emitter id="emitter-1">
        <FixedLightEmitter>
          <PhotometryReference photometryId="photometry-1" />
          <LightSourceReference fixedLightSourceId="fixedLightSource-1" />
          <ControlGearReference controlGearId="controlGear-1" />
          <RatedLuminousFlux>1000</RatedLuminousFlux>
        </FixedLightEmitter>
      </Emitter>
    </Emitters>
    <Geometries>
      <ModelGeometry id="geometry-1">
        <GeometryFileReference fileId="geometryFile-1" />
      </ModelGeometry>
    </Geometries>
  </GeneralDefinitions>
  <ProductDefinitions>
    <ProductMetaData>
      <UniqueProductId>ffaeabab-f040-4a61-a6d1-e879d8f2e374</UniqueProductId>
      <ProductNumber>
        <Locale language="en">42</Locale>
        <Locale language="de">42</Locale>
      </ProductNumber>
      <Name>
        <Locale language="en">Pendant luminaire</Locale>
        <Locale language="de">Pendelleuchte</Locale>
      </Name>
      <Description>
        <Locale language="en">Round pendant light for indoor spaces</Locale>
        <Locale language="de">Runde Pendelleuchte für Innenräume</Locale>
      </Description>
      <Pictures>
        <Image imageType="Product Picture" fileId="pictureFile-1" />
      </Pictures>
    </ProductMetaData>
    <Variants>
      <Variant id="variant-1">
        <Name>
          <Locale language="en">Pendant luminaire</Locale>
          <Locale language="de">Pendelleuchte</Locale>
        </Name>
        <Description>
          <Locale language="en">Description of variant 2</Locale>
          <Locale language="de">Beschreibung der Variante 2</Locale>
        </Description>
        <Geometry>
          <ModelGeometryReference geometryId="geometry-1">
            <EmitterReference emitterId="emitter-1">
              <EmitterObjectExternalName>leo</EmitterObjectExternalName>
            </EmitterReference>
          </ModelGeometryReference>
        </Geometry>
      </Variant>
    </Variants>
  </ProductDefinitions>
</Root>
GLDF archive
Step 12: Create the .gldf archive
Finally, compress your just created folder containing
- The product.xml in the root directory
- All referenced files in their corresponding subfolders
into a ZIP archive and change the extension from .zip to .gldf. Congratulations, you have now successfully created your first GLDF file. We encourage you to browse the documentation and experiment for yourself to learn how to use the full potential GLDF has to offer.
You can download the result here, should you want to compare your file.